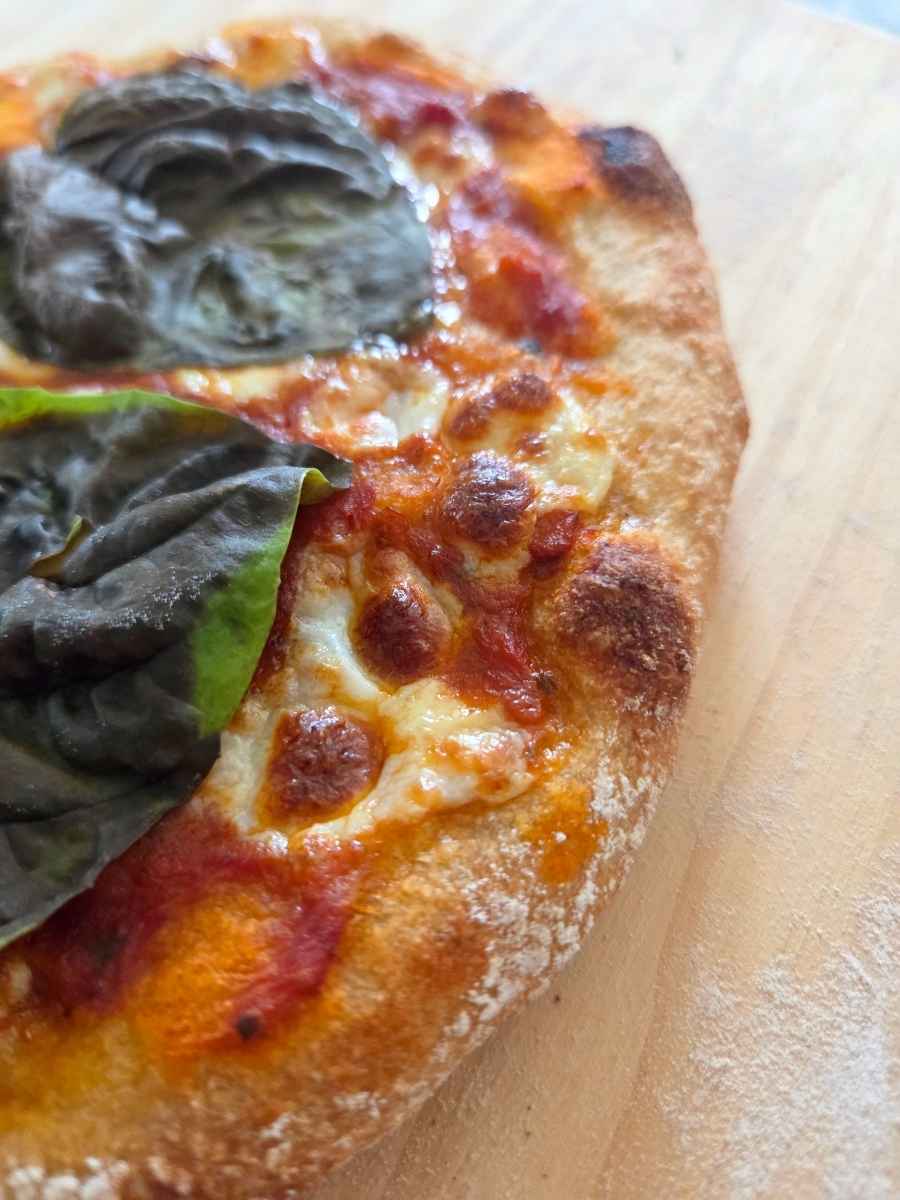
If you’ve been searching for the perfect fresh milled flour pizza dough recipe, this is the one you’ll keep coming back to. It has the most incredible chewy texture, a beautifully crisp crust, and that classic artisan-style bite you’d expect from your favorite pizzeria. Best of all, it’s surprisingly easy to make with just four simple ingredients.

After testing different hydration levels, kneading times, and fermentation methods, this recipe quickly became our favorite. The secret is the hydration, which creates a soft, airy interior with a satisfyingly chewy bite while still baking up with a crisp, golden crust.
This post may contain affiliate links, please read my disclosure policy for details.
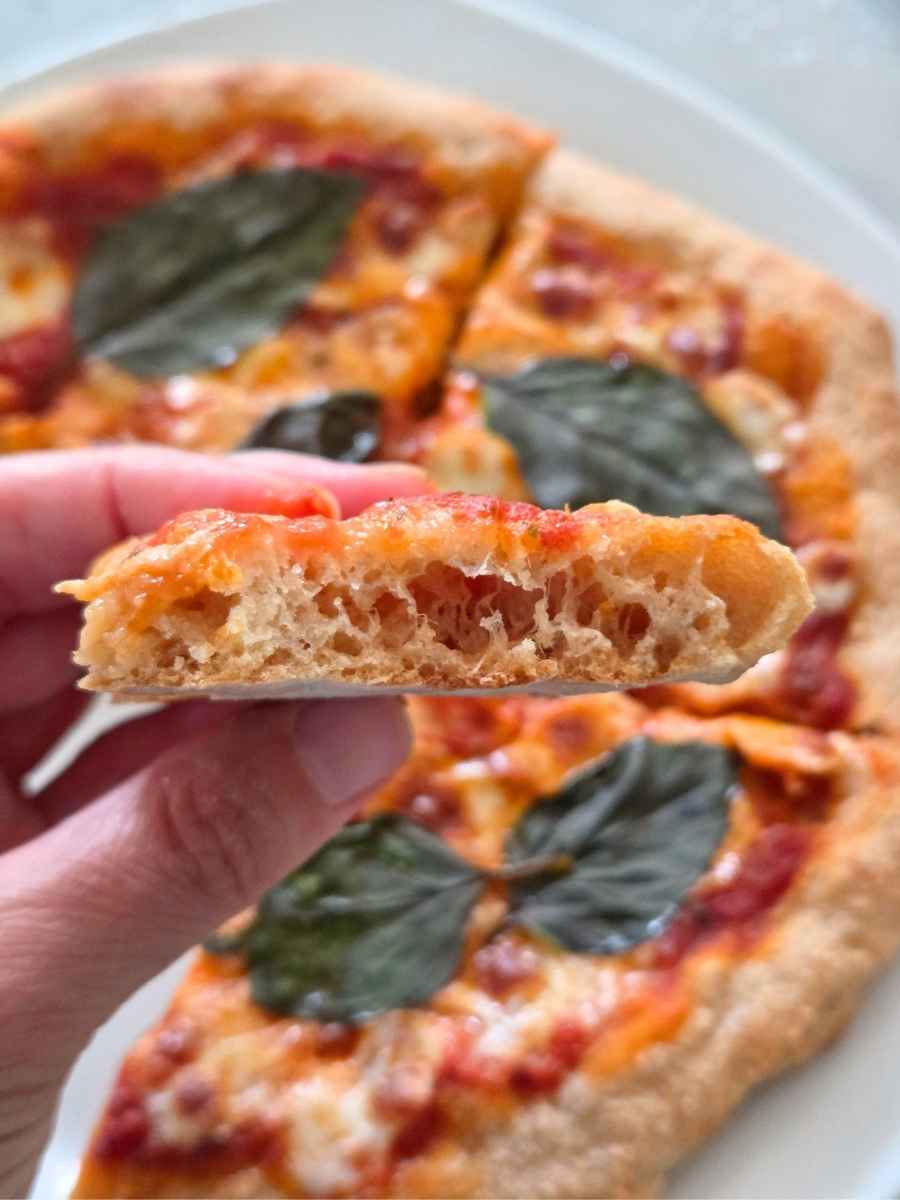
It also passed my husband’s ultimate pizza test—the “foldable test.” Every other fresh milled pizza dough recipe I tried would crack or split in half as soon as you folded a slice. This dough bakes up beautifully soft, chewy, and pliable, so you can fold a slice just like you would at your favorite pizzeria without the crust cracking or breaking apart.
Whether you’re making classic pepperoni, loading it up with fresh garden veggies, or keeping it simple with fresh mozzarella and basil, this dough is the perfect foundation for homemade pizza night.
Why You’ll Love This Fresh Milled Flour Pizza Dough Recipe
Key Ingredients

Tips for the Best Fresh Milled Flour Pizza Dough Recipe
Choose the Right Baking Surface: For the best results, use a pizza stone, baking steel, or cast iron pizza pan. They create a crisp, golden crust that’s hard to beat.
Use a Pizza Peel: A pizza peel makes transferring your pizza to the oven quick and easy.
Handle the Dough Gently: After rising, handle the dough as little as possible and gently stretch it into shape with your fingertips. Avoid pulling or pressing too aggressively so you preserve the air bubbles that give the crust its light, chewy texture.
Try a Cold Ferment: I like making the dough in the morning and refrigerating it until dinner or even overnight. I noticed the finished crust develops more of those beautiful airy holes. Just let the dough sit out at room temp for 30 minutes before shaping.
Preheat Your Baking Surface: Give your pizza stone, baking steel, or cast iron pizza pan at least 30 minutes to fully preheat so it stores plenty of heat for a beautifully crisp crust.
Flour the Pizza Peel: Lightly flour your pizza peel before transferring the dough to help it slide more easily onto the hot baking surface. Give it a quick shake with the topped pizza on it so you know it’ll slide off when you transfer to the oven.
How to Make the Best Fresh Milled Flour Pizza Dough
1. Preheat the Oven
Preheat your oven according to the baking surface you’ll be using.
- Pizza Stone or Baking Steel: Place the stone or steel in the oven and preheat as hot as it will go, up to 550°F.
- Cast Iron Pizza Pan: Place the pizza pan in the oven and preheat to 475°F.
Once the oven reaches temperature, allow it to continue heating for 30 minutes. While your oven is preheating, continue with the remaining steps.
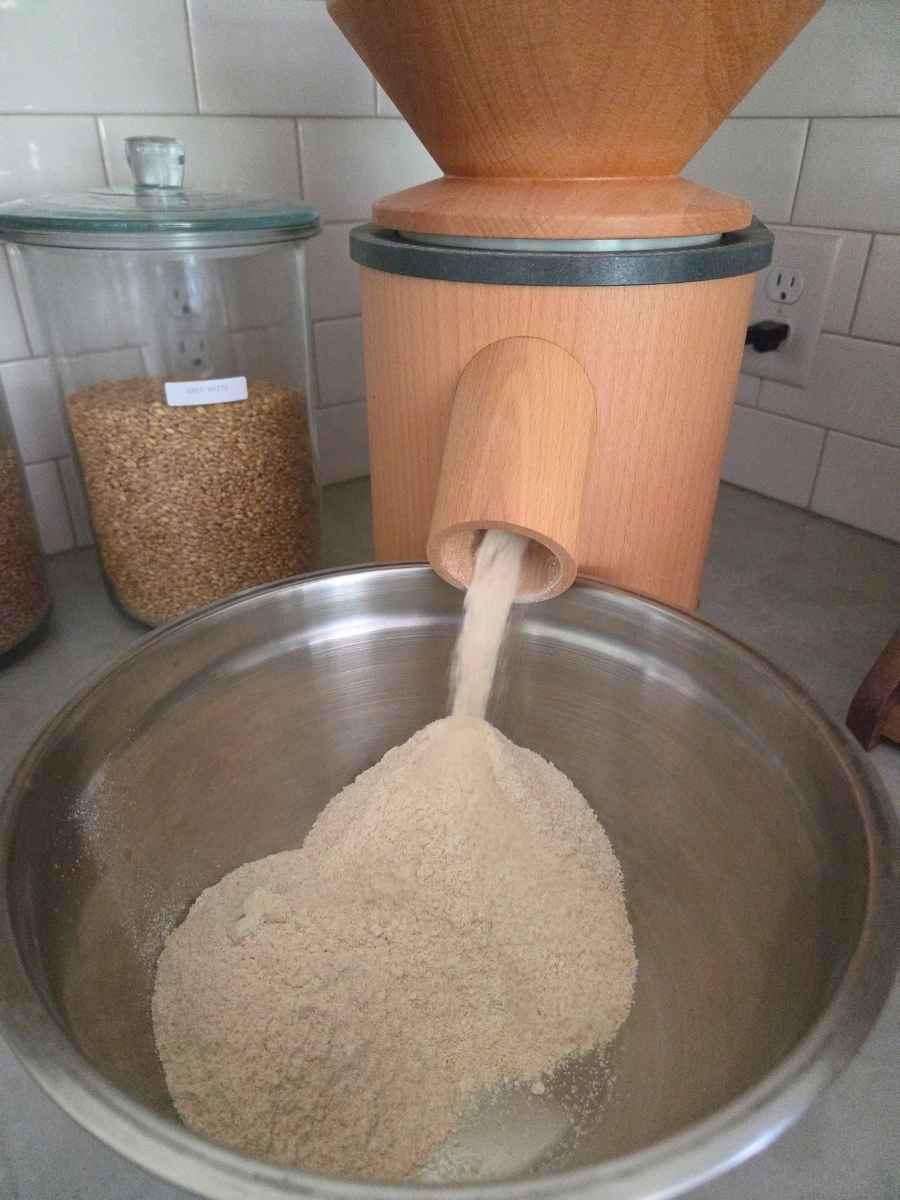
2. Mill the Flour
Mill the hard white wheat berries on the finest setting of your grain mill.
3. Mix the Dough
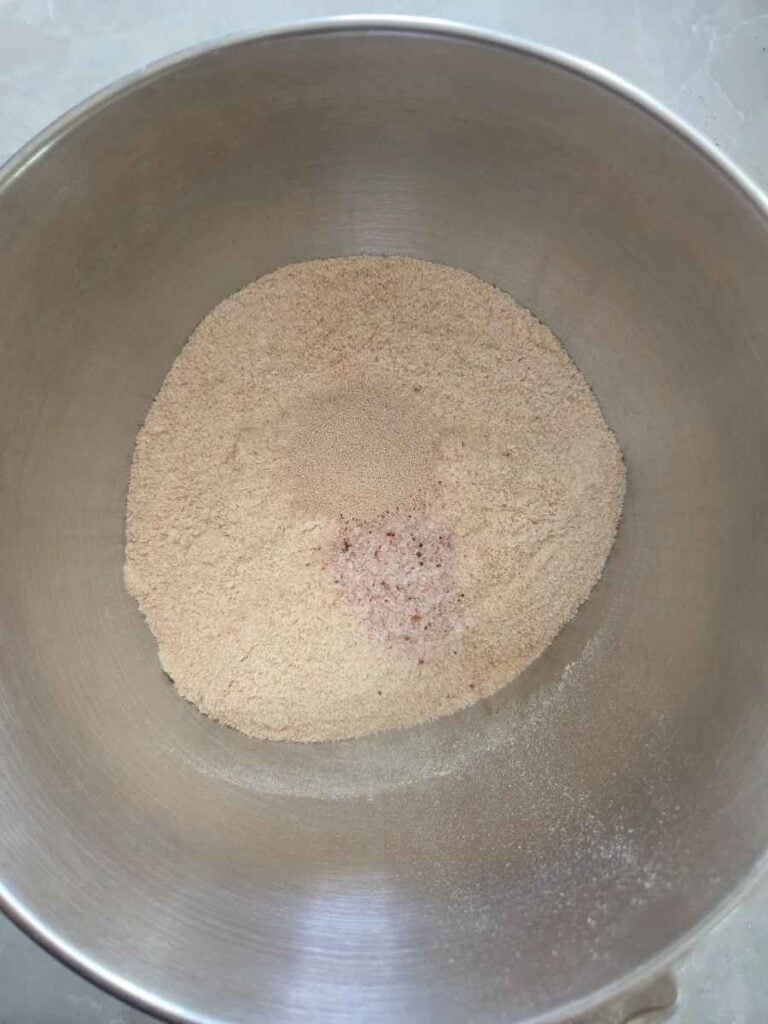
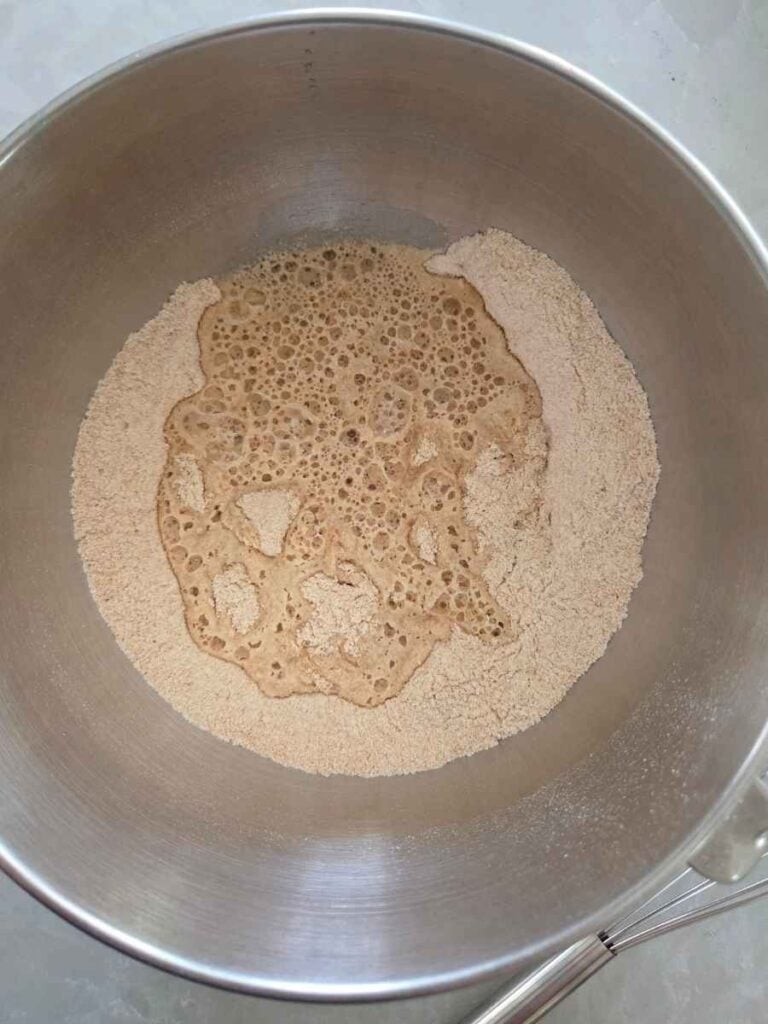
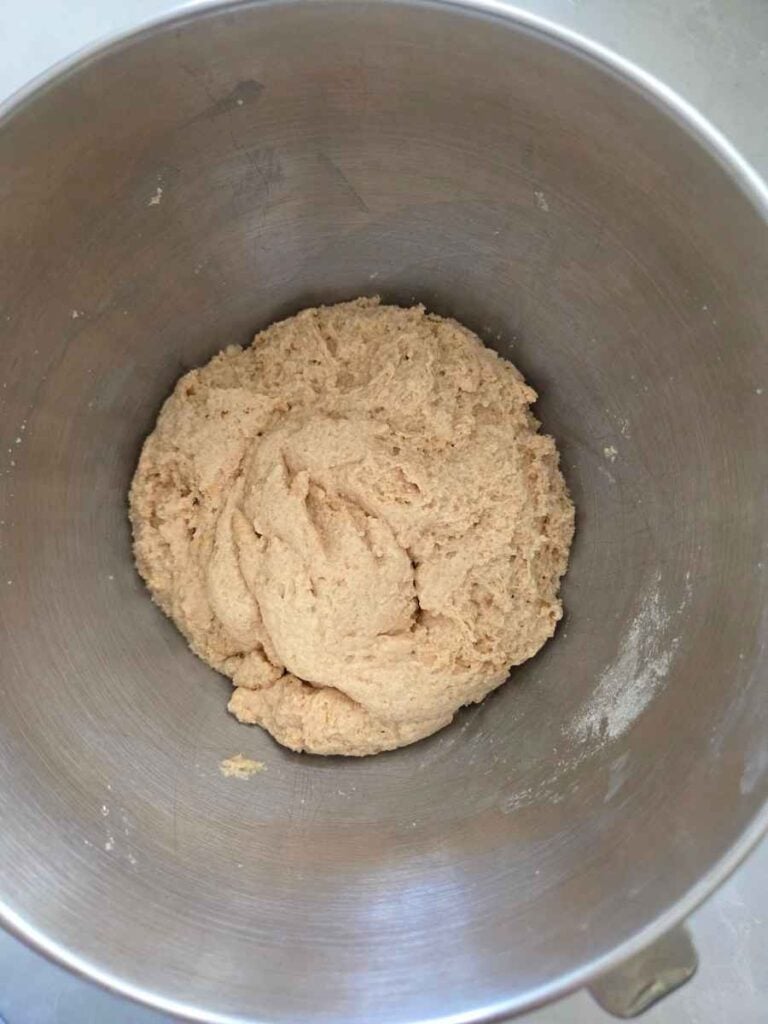
In the bowl of a stand mixer, combine the freshly milled flour, salt, and instant yeast. Add the cold water and mix just until no dry flour remains.
Cover the bowl with plastic wrap and let the dough rest for 30 minutes.
Using active dry yeast? Dissolve the yeast in warm water (95-105°F) first and let it sit for 5–10 minutes before mixing with the flour and salt.
4. Knead
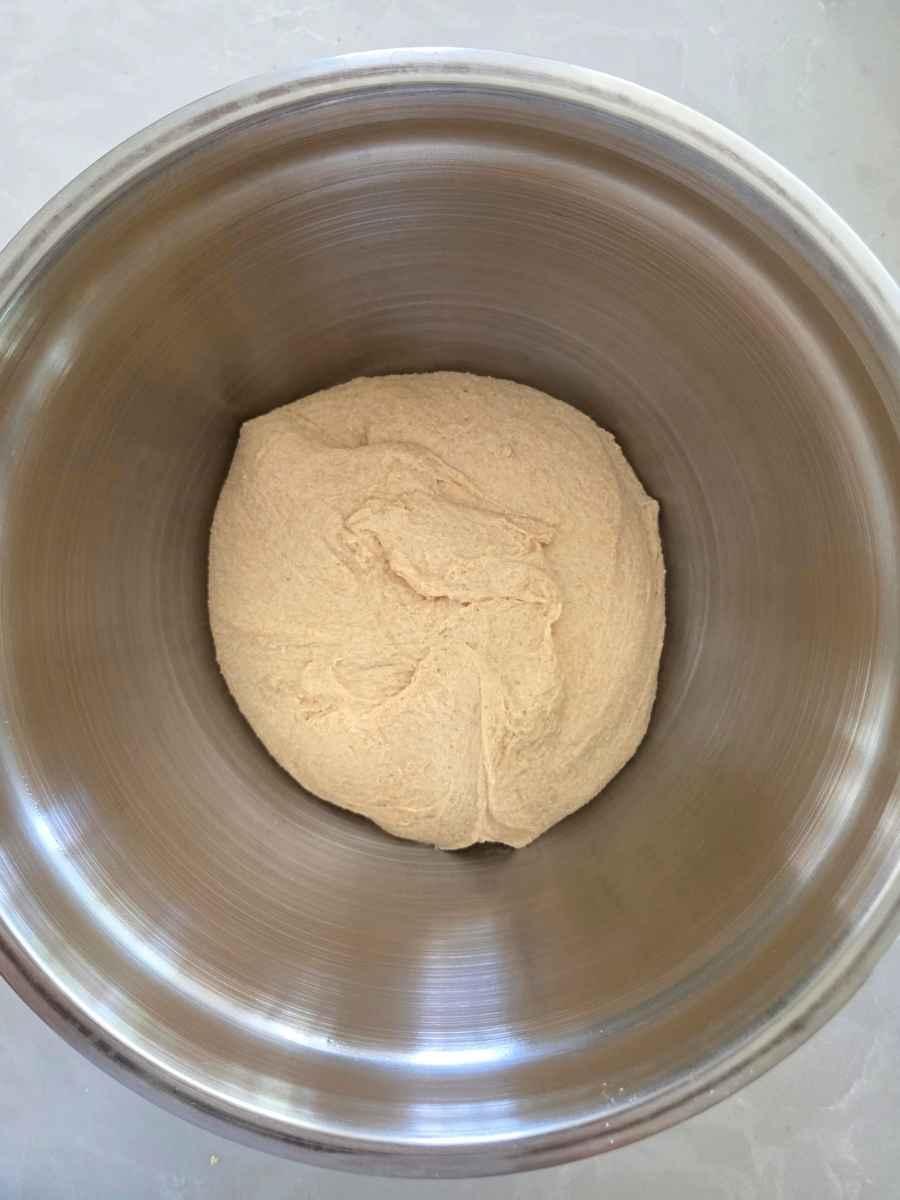
Using the dough hook, knead on medium speed for 8 minutes. I use Speed 4 on my KitchenAid.
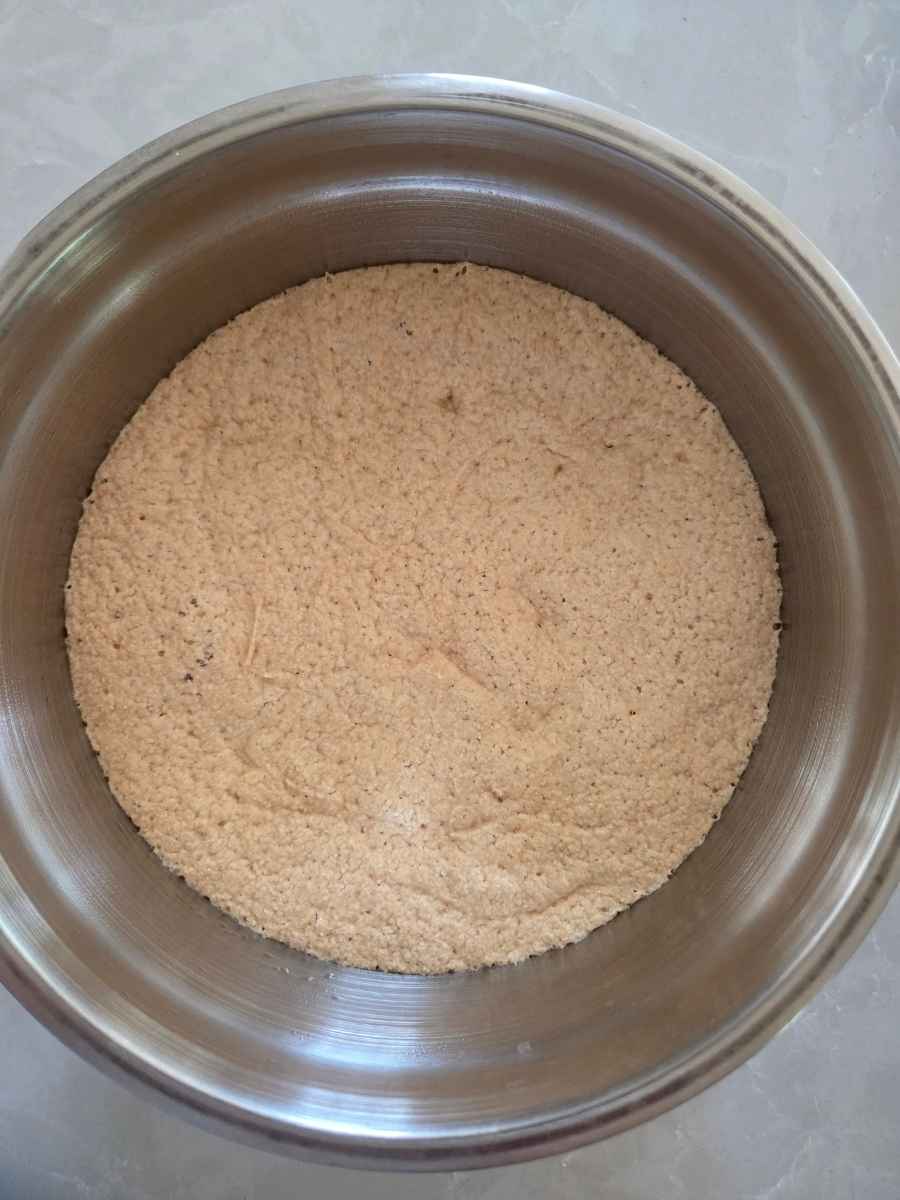
The finished dough should be smooth, elastic, and just slightly tacky. It should pull completely away from the sides and bottom of the bowl and form a single ball around the dough hook while mixing.
5. Bulk Ferment
Transfer the dough to a lightly oiled bowl.
Cover and place it in a warm spot until doubled in size. I like to use my oven with just the light on, which usually takes about 1-1.5 hours, though your timing may vary depending on the temperature of your kitchen.
Optional Step: If you have a few extra minutes during the bulk rise, give the dough 1–2 sets of stretch and folds. With damp hands, lift one edge of the dough until you feel some resistance, fold it over the center, then turn the bowl and continue around the dough. I find this extra step improves the structure of the dough and gives the baked crust an even lighter, airier texture.
6. Divide the Dough
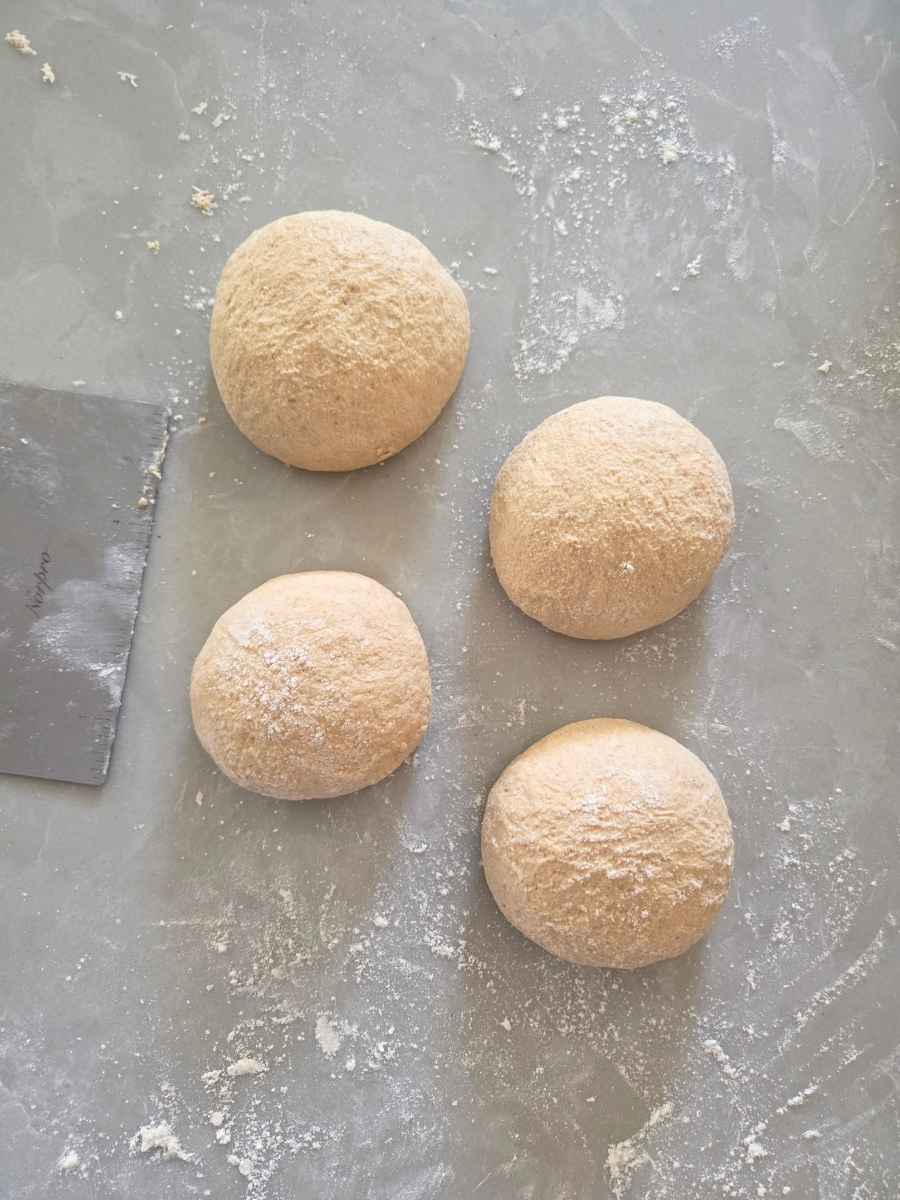
Turn the dough out onto a floured work surface and use a bench scraper to divide it into 4 equal portions.
Shape each portion into a smooth ball, using as much flour as needed to keep the dough from sticking to your hands. I usually use a little all-purpose flour for this step so I don’t have to mill extra flour just for shaping.
7. Final Rise
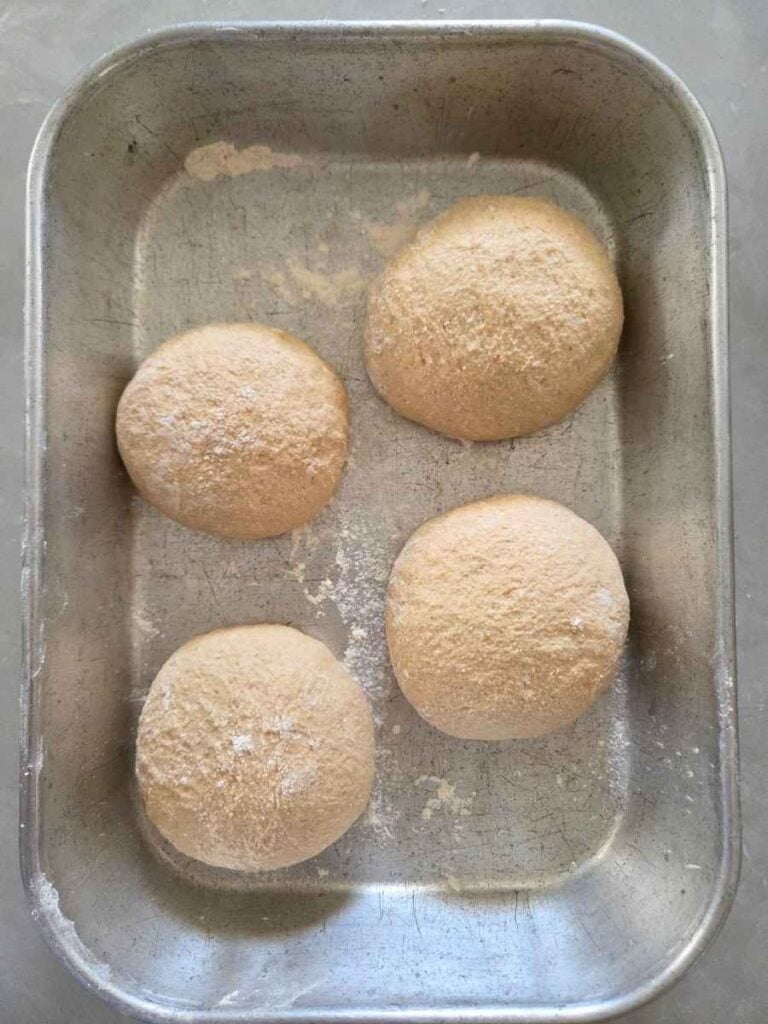
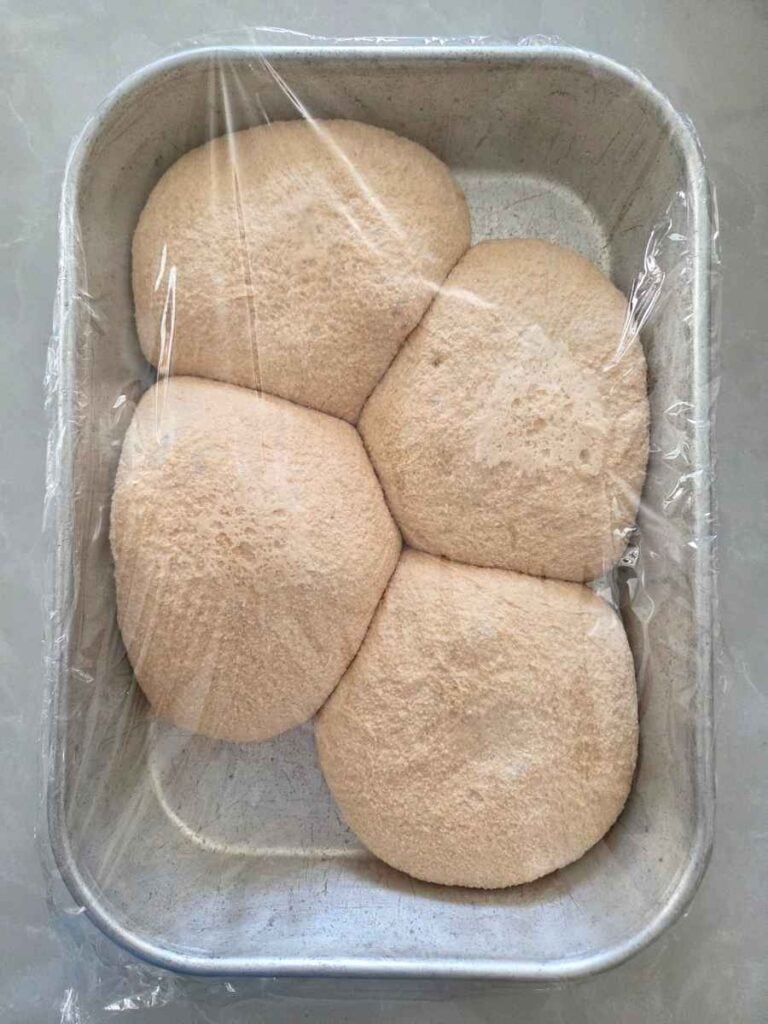
Place the dough balls into proofing containers or a 9×13-inch dish with lid or covered with plastic wrap.
If you’re baking the pizzas the same day, let the dough balls rest at room temperature for 10-15 minutes before shaping.
If you’re making the dough ahead of time, place the covered containers or dish in the fridge.
When ready to make, remove the dough from the fridge 30 minutes beforehand and let the dough come to room temperature in its container before shaping.
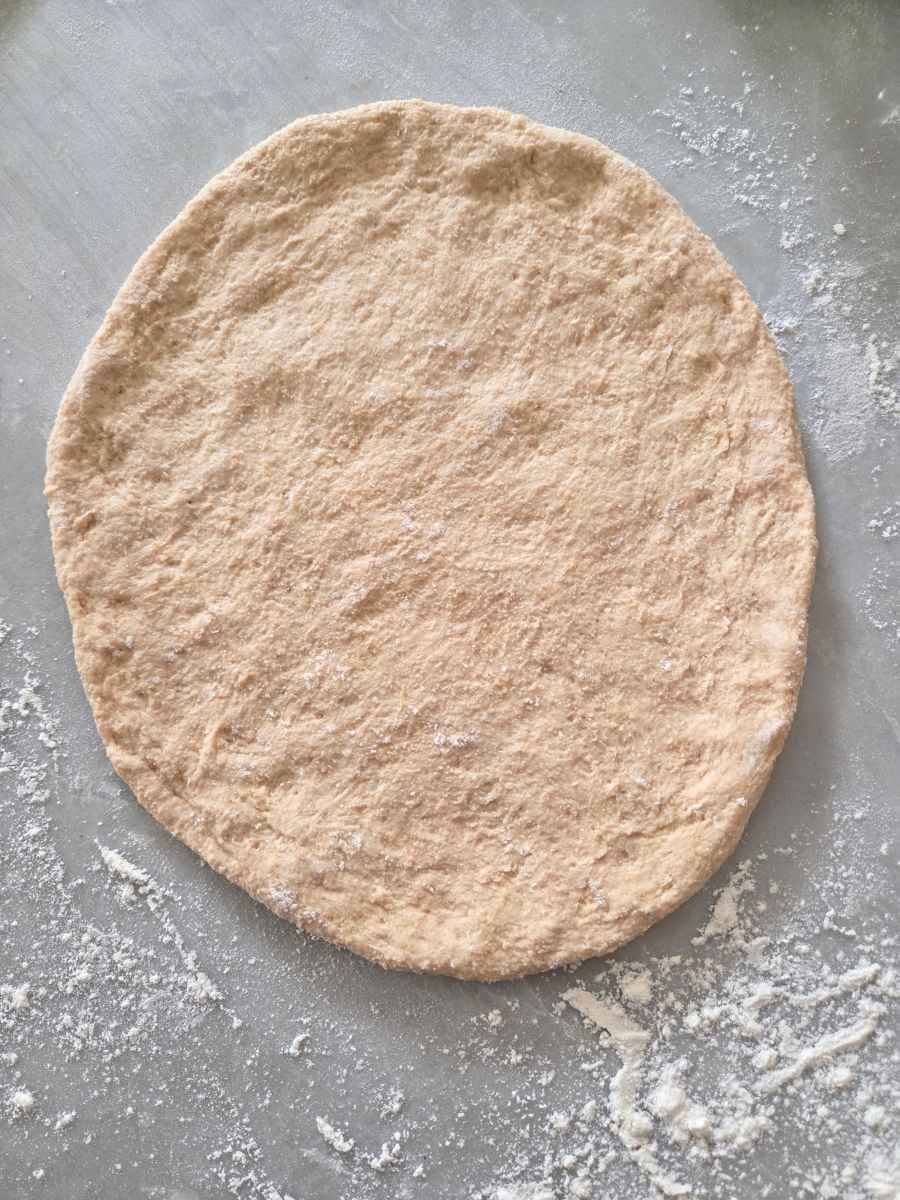
8. Shape the Pizza
Flour your countertop or work surface, then place one dough ball on the flour. Using only your fingertips, gently press the dough into a 10–12-inch round, working from the center outward.
The dough should stretch very easily with gentle pressure. Handle it as little as possible to preserve the air bubbles, which create a light, chewy crust.
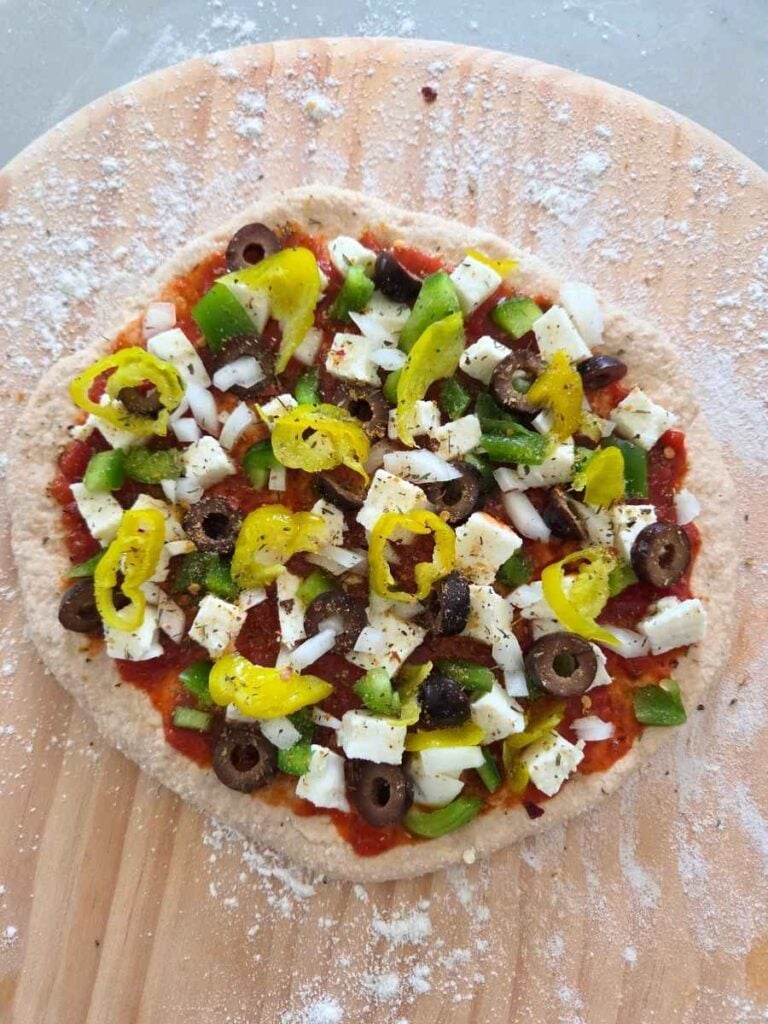
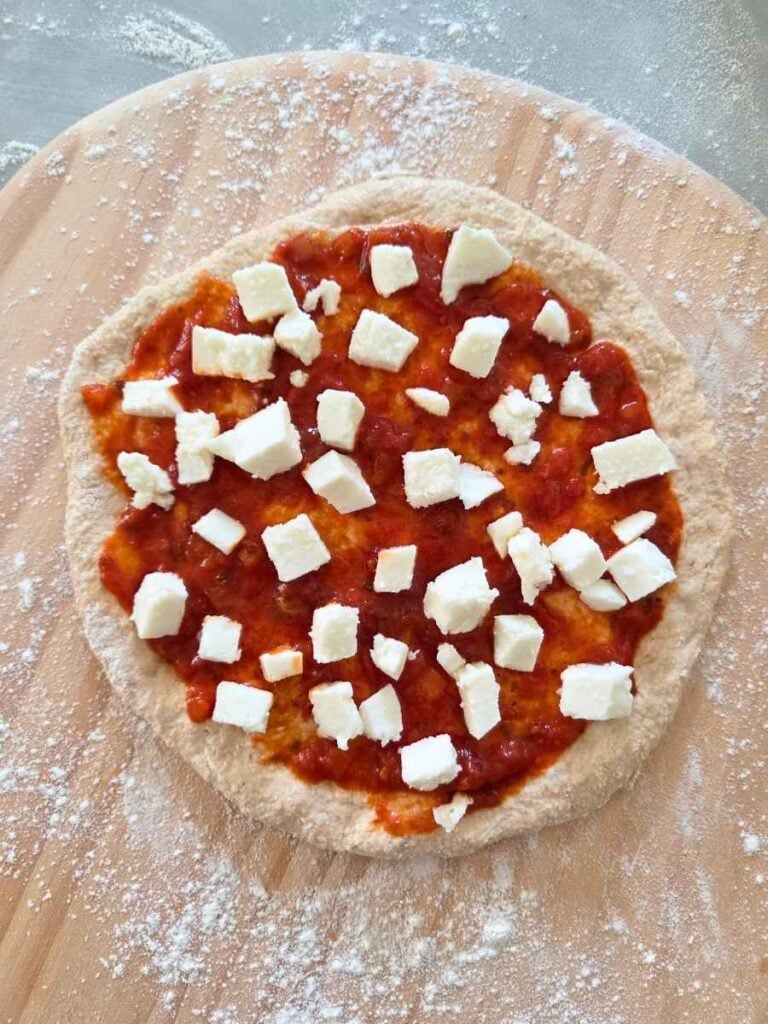
9. Add Your Favorite Toppings
Lightly flour a pizza peel and transfer the dough onto it.
Top with your favorite sauce, cheese, and toppings.
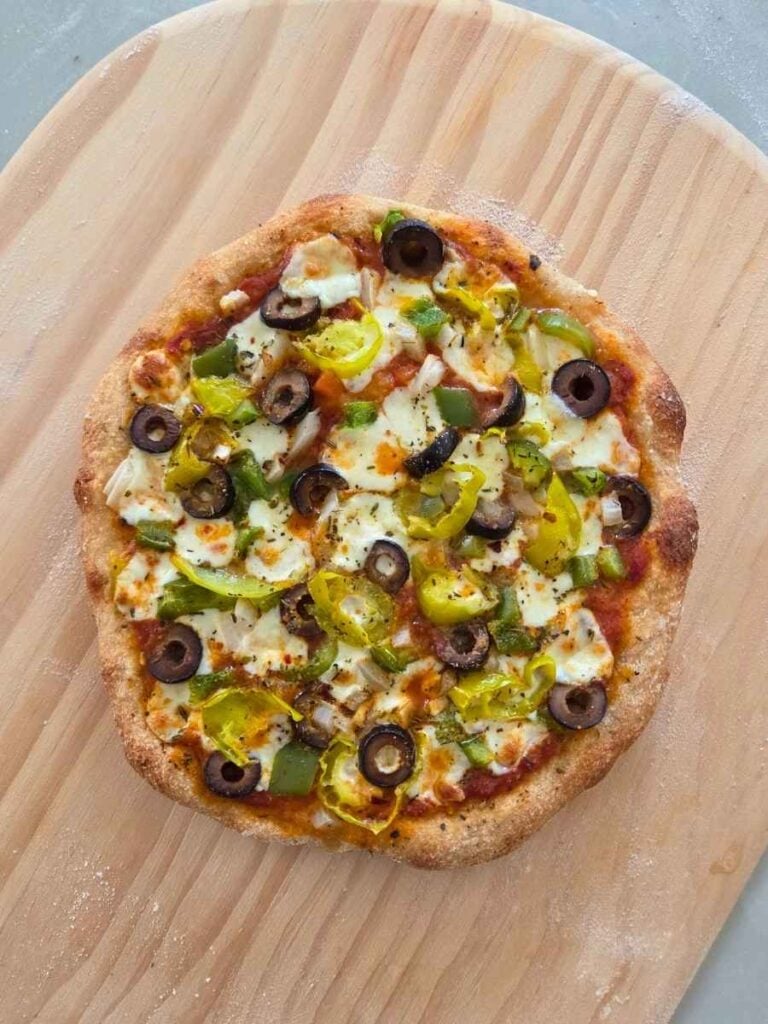

10. Bake
For a pizza stone or baking steel: Lightly flour your pizza peel, then slide the pizza onto the hot stone or steel. Bake at 550°F for about 7 minutes, or until the crust is beautifully browned and the cheese is melted and bubbling.
If your oven only reaches 500°F, simply bake the pizza a minute or two longer, watching it until the crust is golden brown and the cheese is bubbling.
For a cast iron pizza pan: Carefully transfer the shaped pizza onto the 475°F preheated pan and bake for about 10 minutes, keeping an eye on it toward the end. Look for a nicely browned crust and fully melted cheese before pulling it from the oven.
Since every oven bakes a little differently, start checking your pizza during the last couple of minutes and adjust the baking time as needed.

How to Store and Freeze Fresh Milled Flour Pizza Dough
Refrigerator: After dividing the dough into balls, place them in lightly floured, covered containers and refrigerate for up to 2–3 days. When you’re ready to make pizza, take the dough out 30 minutes before shaping to let it come to room temperature.
Freezer: For longer storage, lightly oil the dough balls and place each one in an airtight freezer-safe container or bag. Freeze for up to 3 months. Thaw overnight in the refrigerator, then let sit out on the counter for 30 minutes before shaping and baking.
Leftover Pizza: Store baked pizza in an airtight container in the refrigerator for 3–4 days. Reheat in the oven or hot skillet to bring the crispness back to the crust.
FAQ
More Fresh Milled Flour Bread Recipes

Best Fresh Milled Flour Pizza Dough Recipe
Ingredients
- 520 g hard white wheat berries
- 426 g cold water
- 4 g (1 tsp) instant yeast
- 14 g (2 tsp) salt
Instructions
- Preheat the OvenPreheat your oven according to the baking surface you’ll be using.Pizza Stone or Baking Steel: Place the stone or steel in the oven and preheat as hot as it will go, up to 550°F.Cast Iron Pizza Pan: Place the pizza pan in the oven and preheat to 475°F.Once the oven reaches temperature, allow it to continue heating for 30 minutes. While your oven is preheating, continue with the remaining steps.
- Mill the FlourMill the hard white wheat berries on the finest setting of your grain mill.
- Mix the DoughIn the bowl of a stand mixer, combine the freshly milled flour, salt, and instant yeast. Add the cold water and mix just until no dry flour remains.Cover the bowl with plastic wrap and let the dough rest for 30 minutes.Using active dry yeast? Dissolve the yeast in warm water (95-105°F) first and let it sit for 5–10 minutes before mixing with the flour and salt.
- KneadUsing the dough hook, knead on medium speed for 8 minutes. I use Speed 4 on my KitchenAid.The finished dough should be smooth, elastic, and just slightly tacky. It should pull completely away from the sides and bottom of the bowl and form a single ball around the dough hook while mixing.
- Bulk FermentTransfer the dough to a lightly oiled bowl.Cover and place it in a warm spot until doubled in size. I like to use my oven with just the light on, which usually takes about 1-1.5 hours, though your timing may vary depending on the temperature of your kitchen.Optional Step: If you have a few extra minutes during the bulk rise, give the dough 1–2 sets of stretch and folds. With damp hands, lift one edge of the dough until you feel some resistance, fold it over the center, then turn the bowl and continue around the dough. I find this extra step improves the structure of the dough and gives the baked crust an even lighter, airier texture.
- Divide the DoughTurn the dough out onto a floured work surface and use a bench scraper to divide it into 4 equal portions.Shape each portion into a smooth ball, using as much flour as needed to keep the dough from sticking to your hands. I usually use a little all-purpose flour for this step so I don’t have to mill extra flour just for shaping.
- Final RisePlace the dough balls into proofing containers or a 9×13-inch dish with lid or covered with plastic wrap.If you’re baking the pizzas the same day, let the dough balls rest at room temperature for 10-15 minutes before shaping.If you’re making the dough ahead of time, place the covered containers or dish in the fridge.When ready to make, remove the dough from the fridge about 30 minutes beforehand and let the dough come to room temperature in its container before shaping.
- Shape the PizzaFlour your countertop or work surface, then place one dough ball on the flour. Using only your fingertips, gently press the dough into a 8–10-inch round, working from the center outward.The dough should stretch very easily with gentle pressure. Handle it as little as possible to preserve the air bubbles, which create a light, chewy crust.
- Add Your Favorite ToppingsLightly flour a pizza peel and transfer the dough onto it.Top with your favorite sauce, cheese, and toppings.
- BakeFor a pizza stone or baking steel: Lightly flour your pizza peel, then slide the pizza onto the hot stone or steel. Bake at 550°F for about 7 minutes, or until the crust is beautifully browned and the cheese is melted and bubbling.If your oven only reaches 500°F, simply bake the pizza a minute or two longer, watching it until the crust is golden brown and the cheese is bubbling.For a cast iron pizza pan: Carefully transfer the shaped pizza onto the 475°F preheated pan and bake for about 10 minutes, keeping an eye on it toward the end. Look for a nicely browned crust and fully melted cheese before pulling it from the oven.Since every oven bakes a little differently, start checking your pizza during the last couple of minutes and adjust the baking time as needed.
Notes
Storage and Reheating
Refrigerator: After dividing the dough into balls, place them in lightly floured, covered containers and refrigerate for up to 2–3 days. When you’re ready to make pizza, take the dough out 30 minutes before shaping to let it come to room temperature. Freezer: For longer storage, lightly oil the dough balls and place each one in an airtight freezer-safe container or bag. Freeze for up to 3 months. Thaw overnight in the refrigerator, then let sit out on the counter for 30 minutes before shaping and baking. Leftover Pizza: Store baked pizza in an airtight container in the refrigerator for 3–4 days. Reheat in the oven or hot skillet to bring the crispness back to the crust.Did you make this recipe?
I’d love to see! Tag @freshmilledfarmhouse on Facebook and leave a comment below!